2016年4月24日 星期日

8"x8" chipboard album, page 3--Never give up!

大家好,娜歐又帶了新相編回來了~
 
是不是覺得這次動作很快?呵呵~其實這次連續分享的三張相編,
 
早在上星期就已經做好了,但我寫文章的速度真的比較慢…
 
主要是因為每次在寫英文時,都要花時間想!(我承認自己英文不好啦…)
 
平時下了班回來腦袋都鈍了也累了,
 
光是打一篇文章可以花上四、五個小時…都還沒辦法完成…><
 
所以如果你(妳)看到文章裡的英文怪怪的,也請你們自動跳過唄~
 
(這對我來說是很常發生的事,哈哈~^皿^)
 
這次的相編靈感,是來自於某天我去買午餐時看到店家一角放著一籃籃層層堆疊的可樂瓶,
 
當時只是看著它們發呆(因為餐點還要等,而我肚子餓了…)!
 
結果看著看著腦子就突然開始天馬行空~
 
剛好之前在加拿大拍了些跟可樂有關的照片,於是就開始思考如何將它們結合!
 
Welcome back, my friends~
 
Now who's thirsty?
 
There's a bottle of coca in my layout. Please feel free to drink. ^皿^
 
It's time to share my new page with you !
 
 I just finished page 3 of an 8"x8" chipboard album.
 
Let's grab your coca and enjoy it.\ (^O^)>
 
 
為了突顯可樂瓶,我本打算用全白的紙當底,但後來覺得太素,所以換了這張!
 
用鉛筆畫出瓶子的形,本想要用上色的方式來呈現,不過畫完後就改變主意了~
 
I was going to draw a bottle line and coloring myself.


我另外找一張紙再畫一次瓶身,然後剪下來拼貼!
 
只要把照片修一下,就跟瓶身很配了~
 
(我是將兩張照片洗成一張4*6,然後裁成一半來使用)
 
But then, I changed my mind!
 
I cut a piece of paper in a bottle shape.


接下來就來設計一個有個人風格的瓶子吧!
 
我找了一張上面有花的美術紙,剪下上面的美花來使用~
 
Added some paper flowers that I fussy cut out.


確定對自己的排版滿意後,就開始黏貼的動作~
 
完成後我有在紙上先上一層透明Gesso以便在瓶子上上色。
 
(瓶子的右邊三張小照片也是上次在可樂店照,我直接剪下來豐富版面)
 
After sticked them down I applied clear Gesso on top of layers.(Not include photos) 
 
Then started to add some color to emphaize the bottle shape,
 
and made it looked like there's liquid insied.
 
 
這次因為是以可樂當主題,所以我也上網去找跟可樂有關的引語,
 
個人覺得這可以在自己不順心時,提醒並鼓勵自己不要放棄~
 
I found this quote on internet. It's kind of encouraging and reminding sentence for me.  
 
 
看的出來我在這張相編裡放了哪些效果嗎?
 
讓我報給你們知~
 
Done! How does it look?
 
 
仔細看瓶子裡,我有製造氣泡的感覺哦,有注意到嗎?
 
Take a closer look! Does anyone notice there's some sparkling inside the bottle?
 
 
下半部的瓶身有水珠效果哦~
 
Also some water-drops~


剛好我有一堆瓶蓋等著我用,還有什麼比它更適合這裡?> <


當初選這張紙當可樂瓶時沒想太多,完成後才發現它跟可樂的顏色有點接近,
 
難怪覺得它這麼順眼,哈哈~
 
 
看完了娜歐的分享,希望你們喜歡並有給你們帶來一點手作靈感!
 
祝大家有個快樂的手作天,我們下次再見囉~^^
 
I really love how this page came out! Don't you?
 
I hope you get inspired today! Stay calm and keep crafting, everyone~
 
I'll see you next time~^^
 

2016年4月23日 星期六

8"x8" chipboard album page2--Life is like a butterfly, you can chase it or let it come to you.


這次的8吋相編本真的讓娜歐玩上癮了!沒想到這麼快就來跟大家分享第二張~
 
娜歐在一年半前去了一趟加拿大,當時去了Niagara parks的Butterfly conservatory,
 
走進專培育蝴蝶的溫室裡,身旁有數不盡的蝴蝶飛來飛去,連走路都要小心踩到它們!
 
Hello, everyone~ It's good to be back again!
 
 I'm here to share another finished 8" scrapbooking layout with you~
 
 I used two pictures that I took in Niagara parks, Butterfly conservatory.
 
There were  so many kinds of butterflies in the greenhouse.
 
 They would flying around you or stoped over your...shoe.
 
(because my shoe looked like a huge flower to them?)


可能是當時我穿的鞋顏色太亮太鮮豔了吧,只要我停下來,就會有蝴蝶停在鞋子上!
 
也因此讓我拍到了珍貴的畫面,於是這次決定將這兩張照片做成相編好好收藏~
 
 I thought it was a precious momory to keep. So~let's get start it!\(^o^)/


接下來帶大家來看一下製作的大概過程(因為我…又做的太黑皮了,所以只拍了幾張照片…><)
 
不知是從哪裡來的想法,娜歐選了這張紙當底,然後又從另一張美術紙上剪下這些英文字!
 
將這些都貼上頁面後,為了不讓背景搶走照片的焦點,我塗上白色Gesso~
 
 I chose two papers. One for base, and cut those words from another! 
 
 
再來是放上一些自己想要的素材先排版!
 
Always needed to make sure everything before I sticked them down!


滿意排版後就開始黏貼固定並且上色!
 
你們看到這張照片的右下角,是我正在幫字上“金箔”,
 
這金箔我是第一次用,覺得很有趣,你們也能試試看哦~
 
This was first time I useing gold foil on my project.
 
(I added gold foil on word "butterfly" and around the eages.)
 
 
後來我在紙板的四個邊都有用金箔效果(但照片真的很難看的出來…T-T)!
 
 
 Yeah...I know it's hard to see the foil result in the picture... 
 
 
這樣是不是比較有感覺了?
 
為了這張相編,我找了各種跟蝴蝶有關的引句,其中我覺得這段跟照片很適合~
 
 How about this?
 
 
系金A,,系金A~
 
However! I love this new produst from Prima!


I think the quote I used was perfect for those pictures. Don't you think? ^皿^


「Life is like a butterfly, you can chase it or let it come to you.」 


 雖然很多技巧還要再加強(所以才要練習),但完成了這一頁,覺得很有成就感呢!
 
你們喜歡嗎?期待下次再見囉~
 
The finish page may not be perfect, but I really had lots of fun.
 
Thanks for stopping by my blog. I will see you in next Page~^^


2016年4月22日 星期五

8"x8" chipboard album page1---I may not be perfect, but parts of me are pretty awesone!


哈囉~娜歐又回來了,這次的速度有快很多吧!哈哈~

因為前幾天連續作了幾個新相編,怕累積太多到時寫文章會很痛苦,

所以這兩天一下班就先窩在電腦前面整理照片趕文章!

之前我收集了幾本不同尺寸的厚紙板書,一直沒有時間跟機會拿出來玩…

好不容易平常愛玩立體作品的人,終於轉性想來嚐試做相編了!

不過也因為很少玩相編,如果有做的不好的地方,還請大家多多指教哦~

這次玩的厚紙板書,裡面共有八片紙板,所以算一算…我總共要做16面相編…(超挑戰的啦!)

Hello, everyone~ Welcome back to my blog!

If you already saw all the projects I had made. You would know that I love to make 3D projects.

But this time I want to try something different by using this 8"x8" chipboard album.

There are 8 pieces of chipboard inside the album,

and I plan to make scrapbooking layouts on each piece.

(Each piece has two sides, which means...I have to make 16 layouts!!!oh, my!)

Yes, this may be easy for some of you, but honestly. It's very challenging to me...

I only did scrapbooking layout like 5 or 6 times and I didn't like what I make.

 So I started to working on something that I love--3D projects. 


以下是娜歐打算拿來做第一面相編所用的紙張,Prima最近出了一系列的美紙及其他素材,

真的都讓人愛不釋手每一個都想擁有~(以下這系列賣的超好,連12吋的紙張都缺貨…@_@)

For the first page, I was using a paper from Prima's 'Talls of you & me" paper pad. 


這是我選來當相編的基底紙張~
因為紙板有圓角,所以黏上紙張後,我就先用磨砂工具來修邊!


Then I adhered it on the chipboard and sanded the edges.


然後就來玩顏料囉!
這部份我後來是選用白色的Gesso哦~

Next! Would be Gesso time~


 這次拿出了買了很久都捨不得用的“抗色帆布”(Resist Canvas)

(呵呵…這是我自己取的名啦,因為實在不知它叫啥?所以我就直接照字面翻…)

至於它會有什麼效果?等一下告訴你~嘿嘿

 I have this canvas all the time but I never use it before.

Now it's time to make it usful~


在做以下動作時,我已經先把照片大概要放的位置先做記號了,

所以不需要塗上整面的Gesso~^^


然後剪下一小片抗色帆布
This was a piece of canvas I cut out.


到了這裡別說我沒事先告知,接下來你們會不斷的看到我的照片,可能會傷眼,
所以請勿久視(哈哈~~)!
在製作過程中實在少不了不斷檢視的動作!
這部份的蝴蝶是用型板跟Gesso做出來的哦~
And then applied Gesso with template to make that butterfly.


終於等到Gesso乾了(其實只是用熱風槍吹乾的,也沒等太久啦…)
來看看這些有亮粉效果的水彩,我真的很愛~

Next step was a fun part. Coloring~~^^


看到這張,你們大概就知道那抗色帆布的作用了吧(啊就是抗色咩~)

是不是很好玩啊~

 I love the effect of this resist canvas! Fun! Fun! Fun!

除了水彩,我還用了噴劑哦,不過這裡只是倒出少量的顏料,然後當水彩來上色而已!

I also used this mist to coloring my layout~

然後用防水印台加型板來暈上自己想要的圖樣!

Ink tool is my all time favorite!


這張應該很容易看的出來我加了什麼東西吧,沒錯!就是印章~我蓋我蓋我蓋蓋蓋! 

Everytime when I don't know what I'm going to fit in with my layouts.
 Stamping is very helpful for me.^皿^
接著我選了兩張3x4的紙卡

Again! Love these 3x4 journaling cards. \^o^/ 


把紙的邊邊“惹”毛了才能看到另一種美^皿^


這張紙太漂亮了,讓我忍不住想剪下這些蝴蝶來放生!

Let's "free" these "paperflys"~haha~


因為放出去不見得安全,所以只能放生在自己家裡!>< 
(蝴蝶飛啊~飛到那遙遠的地方~唉啊!這首歌透漏出我的年紀…)
I'm not a detail cutting person. But I really love how it pop up from my page. 
最後只要再加點料就可以算完成了!
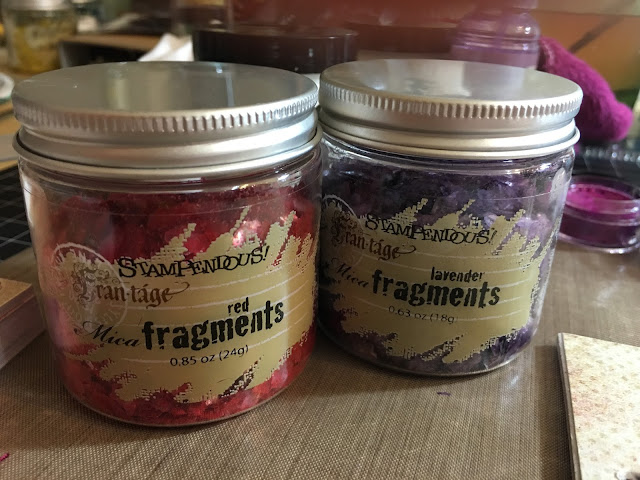
I have lots of mica fragments in different colors! 
你們覺得好看嗎?對於做過的相編十根手指頭都數的出來的我,已經算滿意了!

後來覺得左邊有點空,所以我就上網找了一些引語,

選出了一個自己覺得的適合的放在版面上!

After I added a quote on it. My page is done!


看完這次的作品,希望有給你們一種想自己動手的衝動!

用自己拍的照片做出屬於自己藝術,這感覺很爽哦,快一起試試吧~^^

I really enjoy the process. Hope you like this layout.

I will continue to post my new pages here. See you next time~


2016年4月20日 星期三

I made a scrapbooking layout for Madonna~


哈囉,大家好~ 娜歐這次回來帶了新作品跟大家分享
 
這次我用了Madonna娜姐的照片來做相編
 
這作品是單純想做來自己掛在牆上欣賞的
 
因為我個人很喜歡娜姐,不管是她的歌曲還是精神
 
下面這張照片是完成的成品
 
我還會稍為分享一下製作過程,不過因為中間做的太順,有些都忘了拍照…請見諒!
 
Hello, everyone~ Welcome back to my blog.
 
Today I have a new project to share with you.
 
This is a scrapbooking layout I made by using Madonna's picture.
 
I love this picture, and I would like to have it on my wall.
 
I will share some pictures of process below. hope you will like it.
 
(This is not a tutorial by the way. because I forgot to taking photo sometimes...><)


一開始我是用黑色的8吋厚紙板當底,然後上了透明的Gesso!
 
 I started with an 8"x8" black chipboard, then I used clear gesso on the base.


等到Gesso乾了以後,我就用型板跟塑型劑來豐富版面
 
After it dry, I started to using templates and paste to build the page.
 
 
我還加了一些很細的亮粉,但最後結果是…沒感覺!因為都被我cover 掉了!哈哈~
 
I also mixed paste with mica powder, but I couldn't see any different from this.
 
Because I covered it after all...
 
 
在這裡,我先把照片要放的位置做了記號,這樣讓我好掌握要上塑型劑的範圍!
 
In this part I used a pencil to mark where I want my photo to be.
Then I would know where my paste should be.


然後我開始加入一些素材,用細繩、雲母片、亮片、還有金屬飾品…等,
 
另外還用水彩來上色!
 
Then I added some different elements like mica fragments and twine and water color...etc. 


然後在紙板的四週,我是用金色的ink去暈色的
 
(ink很簡單又很好用的功具,但在這裡建議使用防水的ink哦~)
 
I love to use ink to light up my page. ( I inked around the page.) 


但我不滿足於上面的照片狀況,覺得不夠亮!所以,我又再加強了四週的亮度,
 
這部份也很簡單,我只是用了一些印章做效果而已^皿^
 
But I was not satisfied in how it came up, so I reused stamps and inks to pop up the page.
 

最後終於得到了我滿意的結果,真的起開心的~
 
I really love the result. Do you?


接下來就是做外框了,我選了一張仿相框的美紙(一直捨不得用)
 
將相框中間部份都剪掉!(抱歉,下面的照片不知為啥反了,偏偏我是電腦白痴…請大家見諒)
 
I chosen a paper that already have a ''frame'' on it. All I need to do was cut out a part i need, then used another paper on the base. (sorry for the wrong direction of the photos blow...)


接下來就很簡單了,只要在底下的厚紙板上打洞穿線,就可以把“相框”黏上,其他的只要加
 
一些裝飾就完成了!
 
Next step was simple! I just puched two holes on the bottom chipboard and tie a ribbon.
 
Then sticked them together. Done!


以上是娜歐這次的相編製作,希望大家喜歡!我們下次見~
 
Hope you will like this project. I'll see you next time~